Publish on GitHub and to PyPI
Overview
In this guide, you will learn to release your source code to GitHub and PyPI so that by the end of the guide, you can install your package via pip install <package-name>.
Initiate a release process with GitHub issue
Important
Make sure you have your project is standarlized with scikit-package up to Level 5. Otherwise, please start from the Overview page here.
In the repository, create an issue on GitHub with the Release option as shown below:
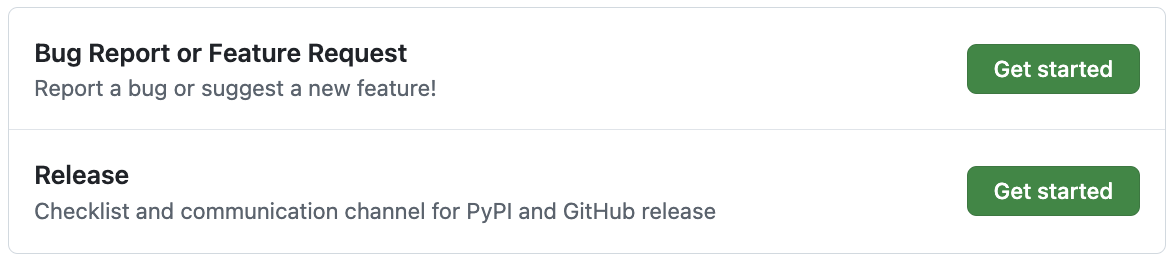
Check off all items in the first checklist for PyPI/GitHub release.
Proceed to the next section.
Start pre-release
Review the release GitHub issue created in the previous step.
Set
PYPI_TOKENandPAT_TOKENare configured at the organization or repository level by following the instructions in Appendix 1, 2, respectively.Setup GitHub Pages at the repository level by following the instructions in Appendix 3.
Confirm the
maintainer_github_usernamesection in.github/workflows/build-wheel-release-upload.ymlis that of the project maintainer.In your terminal, run
git checkout main && git pull upstream mainto sync with the main branch.(Optional but recommended) Install and run the
vulturetool to identify and manually remove unused or dead code before tagging a release:conda install vulture #### Example outputs after running vulture #### vulture src/ tests/ tests/test_module1.py:22: unused import 'os' (100% confidence)
Review the output and remove or suppress unused code when it is not needed to keep the release clean and maintainable.
Run the following:
# For pre-release, use *.*.*-rc.* e.g., 1.0.0-rc.0
# rc stands for release candidate
git tag <version>-rc.<rc-number>
git push upstream <version>-rc.<rc-number>
Done! Once the tag is pushed, visit the Actions tab in the repository to monitor the CI progress.
You will see that the GitHub Actions workflow is triggered and the package is built and uploaded to PyPI and GitHub.
For
pre-release, it will not update the documentation on GitHub Pages. It will also not update the changelog. See the next section for the full release process.
Note
Did you encounter any errors in the workflow, such as permission issues? Check the solutions provided in Release CI failed. What should I do?.
Full release after pre-release
In your terminal, run
git checkout main && git pull upstream mainto sync with the main branch.Run the following:
# For release, use *.*.* e.g., 1.0.0
git tag <version>
git push upstream <version>
Notice that
CHANGELOG.rstis also updated with the new release version and the documentation is built under thegh-pagesbranch.
Note
Did you encounter any errors in the workflow, such as issues related to CHANGELOG.rst? Check the solutions provided in Release CI failed. What should I do?.
What’s next? Create conda package
To install your package using conda install <package-name>, you can now start with the Create conda package with conda-forge guide!
Appendix 1. Setup PYPI_TOKEN to allow GitHub Actions to upload to PyPI
Generate a PyPI API token from pypi.org:
Visit https://pypi.org/manage/account/ and log in.
Scroll down to the API tokens section and click Add API token.
Set the Token name to
PYPI_TOKEN.Choose the appropriate Scope for the token.
Click Create token and copy the generated token.
Add the generated token to GitHub:
Navigate to the Settings page of the org (or repository).
Click the Actions tab under Secrets and variables.
Click New org secret, name it
PYPI_TOKEN, and paste the token value.Done!

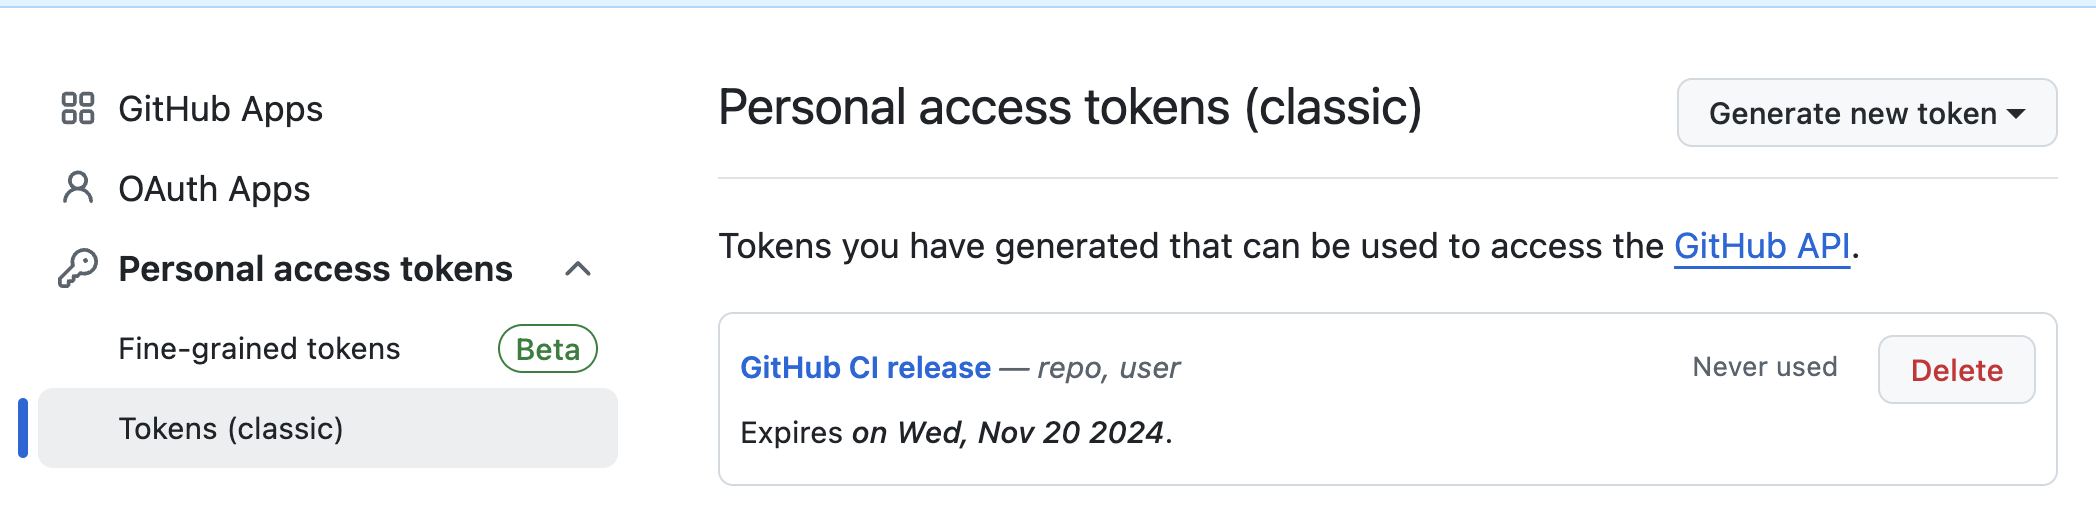
Appendix 2. Setup PAT_TOKEN to allow GitHub Actions to compile CHANGELOG.rst
Recall that dring a release (not pre-release) process, the GitHub Actions workflow compiles the news items in the CHANGELOG.rst file in the main branch. Hence, the GitHub workflow needs to link with this privilege through a personal access token (PAT) of the project maintainer.
Click Generate new token and choose the classic option.
Under Note, write, “GitHub CI release”
Set the Expiration date of the token.
Under Select scopes, check repo and user.
Scroll down, click Generate token.
Done!
Copy and paste the PAT_TOKEN to your GitHub organization:
Settings in the organization.
Click the Actions tab under Secrets and variables.
Click New organization secret and add a new secret and name it as
PAT_TOKEN.Done!
Appendix 3. Host documentation online with GitHub Pages
Let’s now host the documentation online, e.g., https://diffpy.github.io/diffpy.utils, using GitHub Pages.
Visit .
Click Deploy from a branch under Source.
Choose the gh-pages branch and /(root)
Click Save.
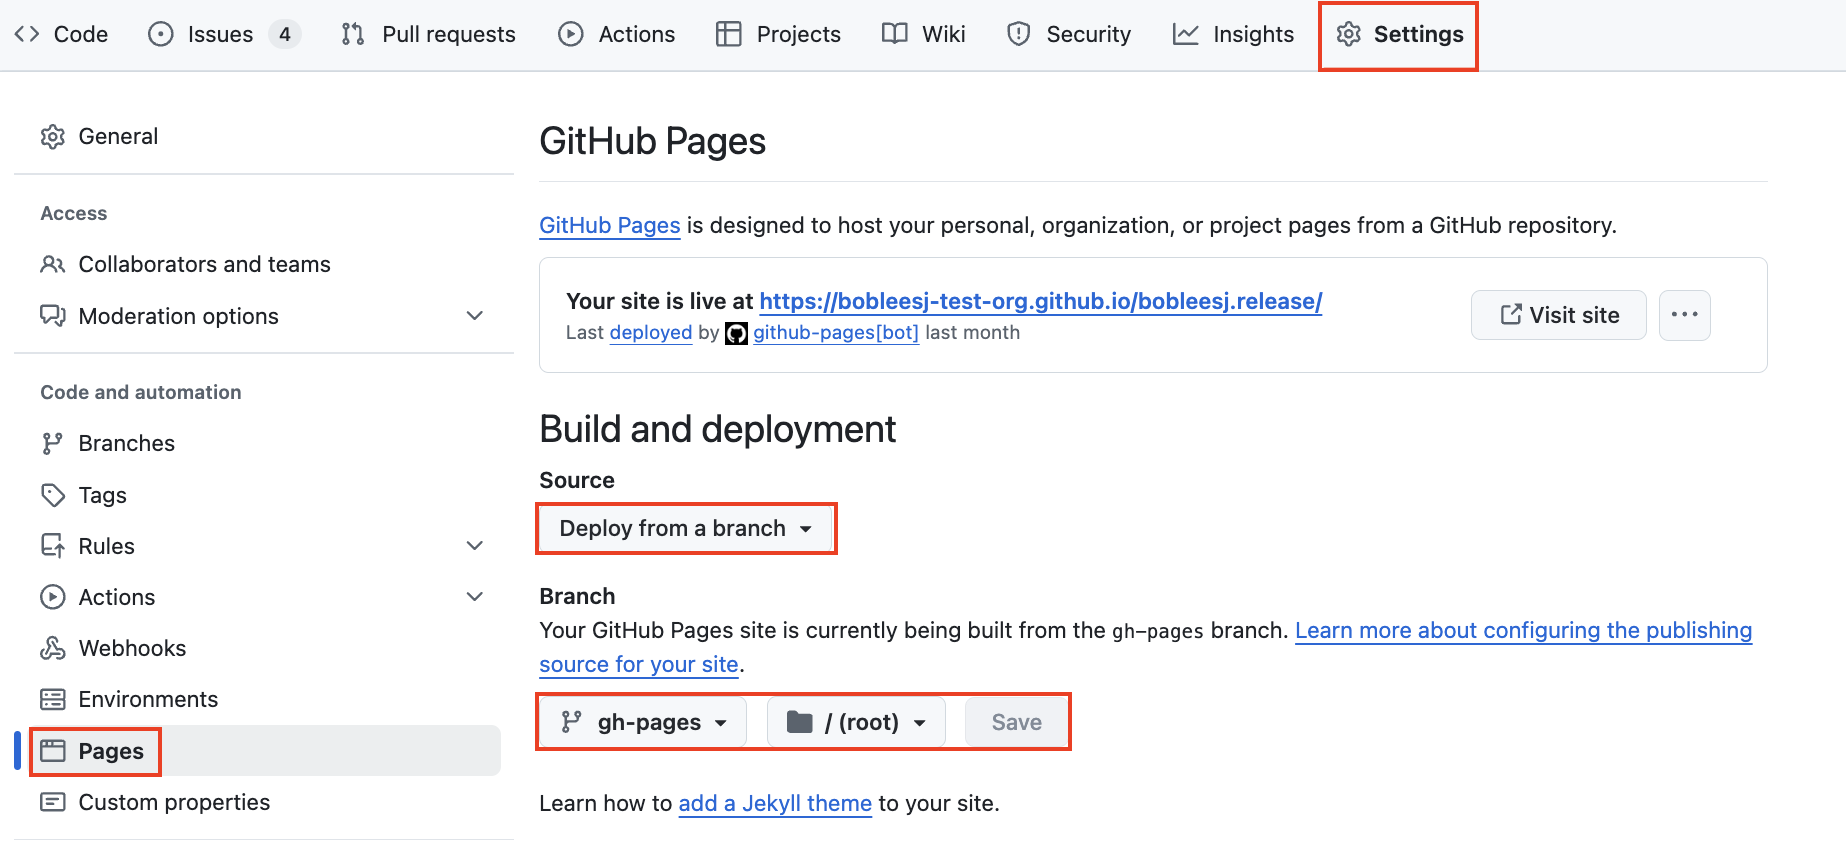
Done! Wait a few minutes and visit your GitHub Pages URL!